This is the main menu of the Endian Hotspot. Almost all settings are configured in this menu. You have to use this menu if you want to manage accounts, specify ticket rates, modify your settings or have a look at the log files or at the statistics.
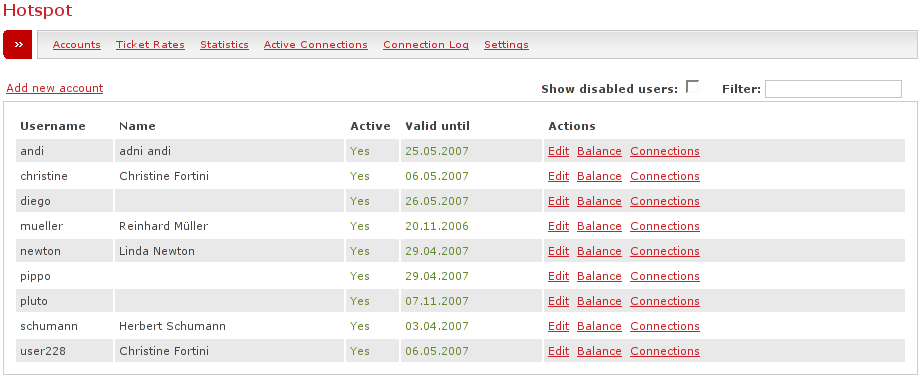
By clicking on the Accounts link in the submenu of this page you will be presented with a list of all enabled accounts for this hotspot. If you want to show the disabled accounts to, you will have to tick the Show disabled users checkbox which will reload the page and show both enabled and disabled users. If you want to display any users that match certain search criteria you can enter your filter in the appropriate textfield and then hit enter.
The list itself consists of five columns:
- Username
This column displays the username of the user.
- Name
This column shows you the real name of the user.
- Active
Shows if the user is still active or not - if you did not choose to show disabled users you will see Yes here for every user.
- Valid until
Will display the date until the current user is valid.
- Actions
In this menu you can find three links for every user. If you want to edit the current user you have to click on the Edit link. By clicking on the Balance link you will be presented with a page of the user's credit balance while by clicking on the Connections link you will see a list of all connections of the current user.
If you want to add a new user you can do this by clicking on the Add new account link on top of the list.
Note
It is not possible to delete users. Disable them instead.
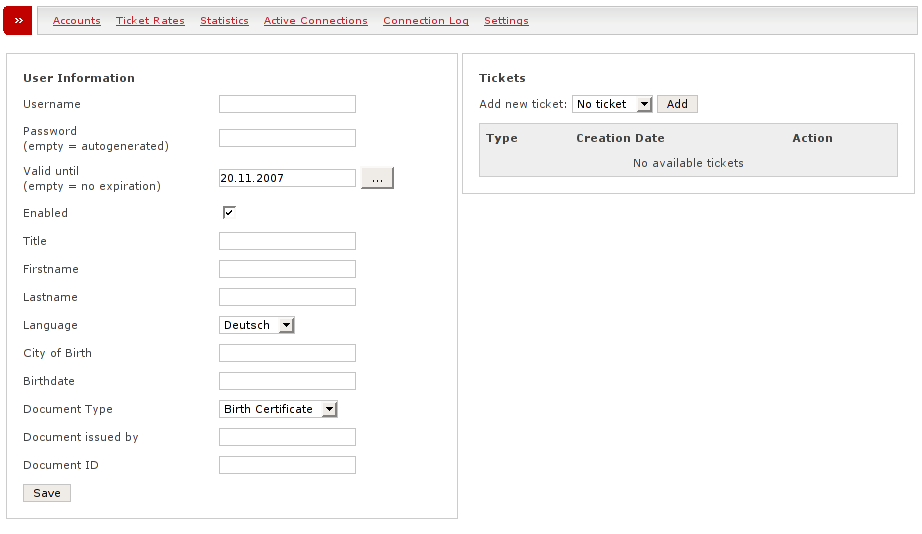
This is the User Information dialog which is shown if you want to add a new account or edit an existing one (then of course with all the known values alread filled in). Most of the fields should be self-explanatory but we will describe them anyway.
- Username
In this field you have to enter the username. This is the only mandatory field.
- Password
In this field you can enter the password for the new account. This is shown in plain text. If you do not have the time to think of an adequate password just leave this field empty and the password will be autogenerated.
- Valid until
The date until the account will be valid. If you want to change it you can either enter the new date manually or click on the button and select the new date from the calendar popup.
- Enabled
This checkbox specifies if the account is enabled or not. If this is ticked on the account is active. If you want to disable a user tick this checkbox off.
- Title
The user's title. A good example would be Dr.
- Firstname
The user's first name.
- Lastname
The user's last name.
- Language
Here you can select the user's native language if available. Otherwise English should be a good choice.
- City of Birth
The user's city of birth.
- Birthdate
Here you can enter the user's birth date.
- Document type
This lets you specify the document type you used to identify the user.
- Document issued by
Here you can specify the issuer of the document that was used to identify the user.
- Document ID
This field lets you specify the document's identification number.
- Save
By hitting this button you will save the entered information.
This option is only available when editing an already existing account. By hitting this button a dialog will be opened to print the user information.
On the right side of the screen you will notice the Tickets section. If you want to add a new ticket to the user just select the appropriate ticket-type and hit the button. Below you will notice a list of all tickets for this user with the following information:
- Ticket type
The type of ticket.
- Creation date
The on which this ticket has been created.
- Action
If the ticket has not been used yet you will be able to Delete it here by clicking on the appropriate link.
Note
If the ticket has already been used no Delete link will be available.
Note
If a user has both pre-paid and post-paid tickets when logging in he will automatically use his pre-paid ticket first and only if that ticket(s) expire(s) the post-paid ticket will be charged. If however the user does not have a post-paid ticket and the pre-paid ticket runs out of money the connection will be stopped.
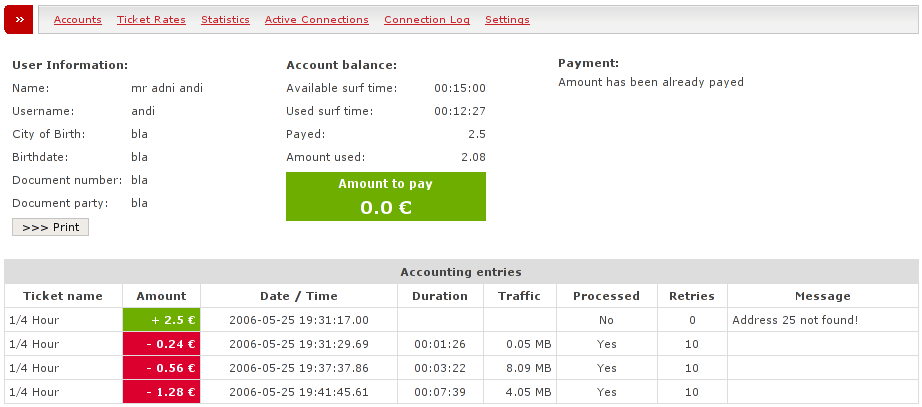
The user balance window is split horizontally into two main sections. The bottom section shows a list of all tickets for the current user containing the following:
- Ticket name
This is the name of the ticket-type.
- Amount
The amount of money that has been used or paid.
Note
If the amount is positive this will represent a payment.
- Date / Time
The date and time when the ticket has been issued.
- Duration
The duration of the session.
Note
Payments do not have a duration.
- Traffic
The traffic that has been used during this session.
Note
Payments do not use any traffic.
- Processed
Here you can see if this ticket has been processed by ASA.
Note
This feature is only available if ASA is enabled. ASA is a hotel management software written especially for South Tyrolean hotels. We will not go into details of ASA here.
- Retries
This field will show the number of retries when connecting to ASA.
Note
This feature is only available if ASA is enabled. ASA is a hotel management software written especially for South Tyrolean hotels. We will not go into details of ASA here.
- Message
Here you will find the ASA return message if any.
Note
This feature is only available if ASA is enabled. ASA is a hotel management software written especially for South Tyrolean hotels. We will not go into details of ASA here.
On the top section of the window you can find some more information split up into 3 parts. In the left part you will find some information about the user, containing the name as well as the username, the city of birth, the birthdate, the document identification number and the issuing party of the document.
The central part contains information about the Account balance. The available surf time is first, followed by the used surf time. In the third line you can see the amount of money that this user has already paid - this will be displayed in the currency you set in the settings page. The fourth line shows how much of this money has been spent so far. Finally the last line shows the amount of money that is still due to pay. This bigger box will be displayed in green if everything has already been paid.
In the Payment column on the right you can either see a message that everything has already been paid or you can choose the amount of money the user wants to pay and bill that amount by clicking on the Bill button.
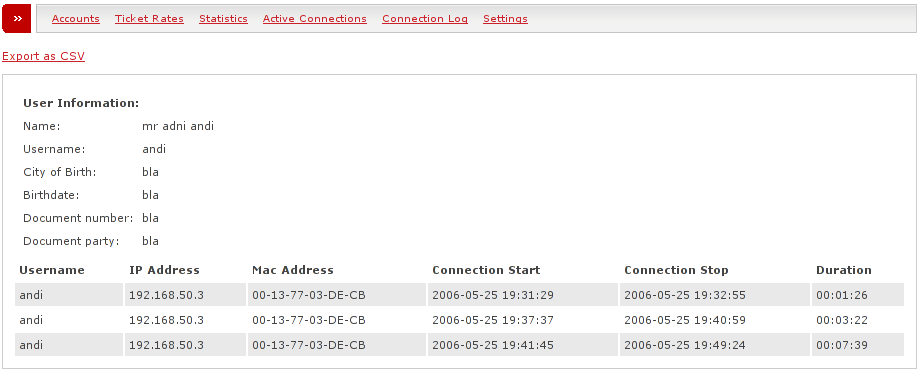
In this window you can see all the connections of the user you specified. The window is split into two parts - at the top you can see the user information, while the bottom part shows all the data regarding the connections. The list with all the connections has six columns:
- Username
The username of this user.
- IP address
The IP address the user had during the respective connection.
- MAC address
The MAC address from which the user was connecting.
- Connection start
The start time and date of the connection.
- Connection stop
The time and date when the connection wos stopped.
- Duration
The amount of time how long this connection lasted.
Endian Firewall gives you the possibility to specify more than one ticket rate. You can even specify if you want a rate to be post-paid or pre-paid. You can create different rates for both types. This is mostly useful if you want to sell different pre-paid types e.g. 4 pre-paid 15 minutes tickets should be more expensive than 1 pre-paid 1 hour ticket.
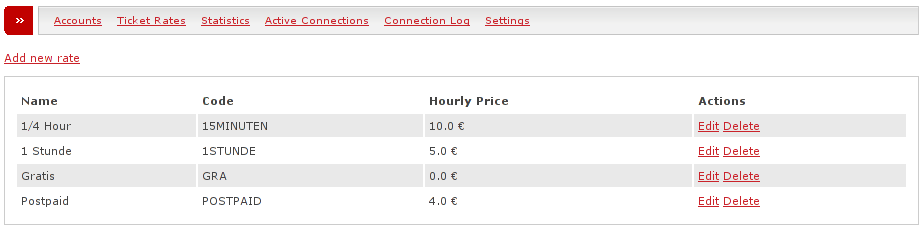
In this list you can see the different ticket rates, the following are the columns:
- Name
The name you gave to the ticket rate.
- Code
This is the ASA code for your ticket rate. Although this can be used only for the ASA hotel management system the field is mandatory.
- Hourly price
This is the hourly price you specify.
- Actions
Here you can choose to Edit or Delete a ticket rate by clicking on the respective link.
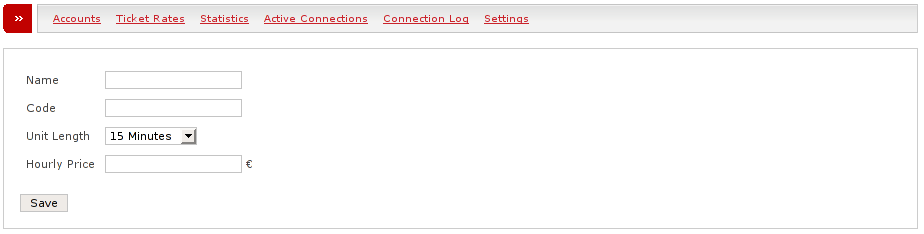
There are four configuration options for every ticket rate:
- Name
The name you want for this ticket rate.
- Code
This is useful just for the ASA hotel management.
Note
This field is mandatory nevertheless.
- Unit Length
This option lets you specify how long one unit of this ticket rate will last. The available options are:
15 minutes
30 minutes
45 minutes
1 hour
2 hours
3 hours
postpaid
While the first 6 entries show you the amount of time that has to be paid in advance (pre-paid), the postpaid length will be paid after the user has used the hotspot and is therefore not limiting the user a priori.
- Hourly Price
Here you can specify the hourly price for a the actual ticket rate. This is useful if e.g. you want the hourly price for 3 hours to be cheaper than the hourly price for 15 minutes. This example will show you how to set hourly prices. The amount after the unit length is the money you will get when selling a ticket of this rate.
- Save
By hitting this button you will save the ticket rate.
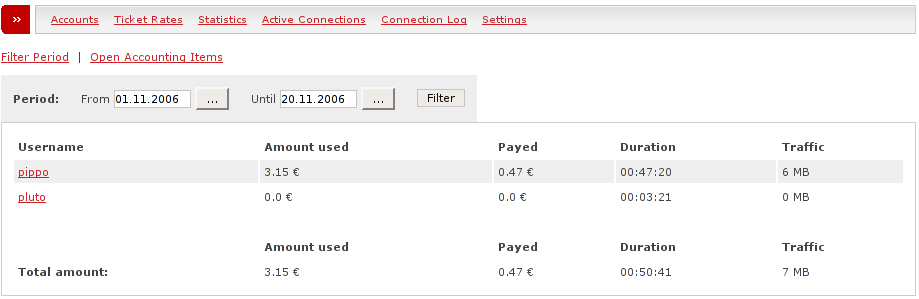
On this page you can see an overview of the connections grouped by user as well as a summary at the bottom of the table. The following columns will be displayed:
- Username
The name of the user.
Note
The username is linked. By clicking on this link you will be redirected to the balance page for that user.
- Amount used
Here you can see how much money each user spent while using the hotspot.
- Paid
This shows how much has been paid by the user.
- Duration
In this column you can see how long the user was connected.
- Traffic
This column shows the traffic the user made during his connection time.
You can choose two different viewing types: Filter Period and Open Accounting Items.
When using Filter Period you can set a start and an end date respectively in the From and Until textfields. Alternatively you can use the buttons to use the calendar-popup to enter the dates. When using Open Accounting items all still open payments will be displayed.

On this page you can see all actually active connections on the hotspot. The list contains the following columns:
- Username
The username of the user that is connected.
- Connection Start
The start date and time of the connection.
- Duration
The amount of time the user is already connected.
- IP Address
The IP address that was assigned to the interface which is connected to the hotspot.
- MAC Address
The MAC address of the interface that was used to connect to the hotspot.
- Action
For every active connection you will see a Close connection link. By clicking on this link you can kill the respective connection.
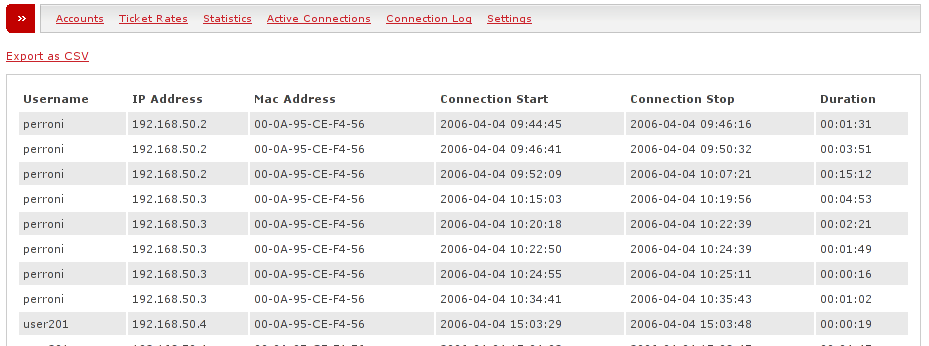
On this site you can see the connection log. The log is display in a table with six columns:
- Username
The username of the user.
- IP Address
The IP address that was used for the connection.
- MAC Address
The MAC address that was used to connect to the Hotspot.
- Connection Start
The start date and time of the connection.
- Connection Stop
The end date and time of the connection.
- Duration
The duration of the connection.
On the top of the page there is a Export as CSV link. Clicking on this link will download a text file containing the log entries in CSV (comma separated values) format.
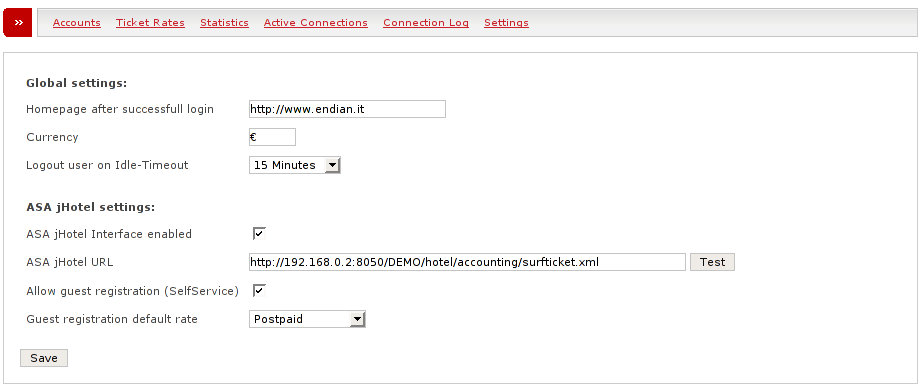
This page consists of two main sections, the Global settings and the ASA jHotel settings. ASA jHotel is a South Tyrolean hotel management platform and will not be described here.
The Global settings contain three configuration variables:
- Homepage after successful login
This homepage will be displayed after a successful user login.
- Currency
Here you can specify your local currency symbol.
- Logout user on Idle-Timeout
After how many should a user be logged out, when doing nothing.
- Save
Click this button to save your settings.